Modular Barns

Monday, November 6, 2006


Highly Recommended Vaccinations

This at-a-glance vaccination chart shows you the vaccinations recommended for your horse, based on his lifestyle.
By the Editors of Practical Horseman magazine

For your purpose of choosing the best vaccination and deworming strategy for your horse, these are the three basic equine lifestyles:

Open herd: This is your horse's situation if he travels frequently to shows or other events where he comes in contact with unfamiliar horses whose worming and vaccination schedules you don't know. Even if he's stay-at-home, he's in an open herd if he boards in a large facility with a high turnover and even more so if manure is not removed regularly from the turnout areas.

Semi-open herd: If your horse and those around him are on regular vaccination and deworming schedules and their fecal egg counts are monitored and all newcomers to the barn are immediately vaccinated and dewormed, your horse fits here.

Closed herd: This lifestyle gives you horse the least exposure to worms and germs. He qualifies if he's in an extremely controlled environment with rare exposure to unfamiliar horses, is turned out in regularly cleaned paddocks and benefits from regular vaccination and deworming program that includes fecal egg counts.

Now that you know your horse's herd type, use the chart below to develop a custom plan that optimally immunizes your horse against disease and controls his exposure to parasites.

HIGHLY RECOMMENDED VACCINATIONS
(Don't Leave Home Without Them)
Disease Description Protocol/Comments
TETANUS TOXOID When a wound such as a deep puncture is contaminated, toxins from the anaerobic bacterium Clostridium tetani, which thrives in the equine environment, cause lockjaw and general muscle spasms, usually resulting in death. For all herd types: Vaccinate yearly.
Give a booster vaccination at the time of penetrating injury or surgery if most recent dose was more than six months earlier. Broodmares should receive a vaccination four to six weeks before foaling.

EE/WEE Eastern and Western Equine Encephalomyelitis, aka Sleeping Sickness, is a vector-borne viral disease causing inflammation of the brain and spinal cord. For all herd types: Vaccinate yearly, in spring (before insect season).
Where Encephalomyelitis is common and/or where there are two annual mosquito "blooms," give a booster EEE/WEE vaccination every six months about a month before the onset of the mosquito season. A vaccination for Venezuelan Equine Encephalomyelitis is also recommended for horses in U.S border areas of Arizona, California, New Mexico and Texas.

RABIES Invasion of the central nervous system by a virus that is fatal if untreated; it also transmits to other animals--including humans. For all herd types: Recommended yearly, especially in areas where rabid wildlife is reported or areas considered to be endemic.
WEST NILE VIRAL ENCEPHALMYELITIS A mosquito-born encephalitis that can be deadly to horses and has been reported in all but a few states. For all herd types: Vaccination recommended very six months.
Two West Nile Virus vaccines are now available; consult your veterinarian about the best choice for your horse. If you're vaccinating your horse against WNV for the first time, he'll require a booster after the initial injection.

INFLUENZA Acute, contagious, viral respiratory-tract inflammation; occurs in isolated cases or in epidemics. Your veterinarian can recommend which form of the vaccine is suitable for your horse. Intranasal Vaccine
Open herd: Every four months.
Semi-open herd: Every six months.
Closed herd: Every six months; add booster two to four weeks before anticipated exposure, such as a show or a long haul.
Intranasal vaccine gives a good immune response when properly applied but can be tricky to administer. If your horse is fussy about substances sprayed up his nostrils, consider using the injectable form.
Injectable Vaccine
Open herd: Every four months.
Semi-open herd: Every four months.
Closed herd: Every six months; add a booster two to four weeks before anticipated exposure.


RHINOPNEUMONITIS Caused by a herpes virus, a contagious infection of the respiratory tract; often induces abortion in pregnant mares. Open herd: Every other month.
Semi-open herd: Every four months.
Closed herd: (Optional) Every six months.
Rhinopneumonitis and Influenza vaccines are sometimes administered in a single combined dose. If your mare is bred, consult your veterinarian about a Rhino vaccination schedule to safeguard her pregnancy.


This chart originally appeared in the article "Protect Your Horse from Worms and Germs" in the April 2005 issue of Practical Horseman magazine.

Wednesday, July 5, 2006

Here is some Good advice for all Horse owners in all parts of the World.

Disaster Preparation for Pets and Horses
Flood. Fire. Hurricane. Do your horse--and yourself--a favor. Plan now for potential disasters.


You never forget the gut-wrenching scenes. An anxious horse entangled in a barbed-wire fence as floodwaters swirl ever higher around him. A dog clinging desperately to a rooftop, inches from the rising water. Bloated livestock corpses bobbing alongside sodden logs or debris. Half-buried animals struggling to escape from mud.

"Whether it's a hurricane, flood, wildfire, or other natural or manmade disaster, an animal evacuation plan can make the difference between life, death, or tremendous suffering for pets and livestock," says Dr. Mark Michalke. He's a field veterinarian for the Texas Animal Health Commission (TAHC) and leader of the Evacuation Committee for the Texas Emergency Response Team (TERT).

Here, we'll share with you tips for developing a disaster plan. While some of these were developed by TERT, they apply to problems anywhere.

Tip: Depending on the disaster, you may need to evacuate your horse or try to ride out the ordeal at home. Either way, we suggest that you put your plan in writing, and give copies to your family, neighbors and barn helpers. That way, if disaster threatens when you're not around, they'll know what to do.

Map An Evacuation Plan
If you should need to evacuate your horses, where would you go? Now's the time to decide--before disaster strikes. It may be as simple as hauling them to higher ground, or you might need to find stabling options elsewhere.

Contact show grounds and fairgrounds, to see if they have unused blocks of stalls. (Have several options in different areas.) Says Dr. Michalke, "Establish a relationship with facilities outside your area before a crisis, and keep phone numbers and addresses handy."

Once you've identified a place to take your horses, be proactive, should a crisis strike. "Calling ahead to reserve space will increase your chances of gaining space for your animals," advises Dr. Michalke.

Map several routes (one could be blocked), and determine how you'll get your horse there. Check with your regional disaster planning and emergency services for routes and other evacuation ideas.

Do you have a trailer? If not, make other plans for emergency transport. If you'll be using your rig, keep it evacuation-ready. Perform a weekly check to be sure tires are aired up, trailer floorboards are solid and safe, and that the hitch is in working order. Keep your truck gassed up.

Adds Dr. Michalke, "Leave early and allow time for hauling. Don't wait until roads become congested or impassable, as this will stress your animals."

Don't forget to plan for yourself and your pets. "Most shelters will not accept pets, so it's important to know ahead of time where animals can be housed," says Dr. Michalke.

Make An Emergency Evacuation KitIf waters are rising or flames are licking at the barn door, the last thing you want to be doing is scrambling around trying to find halters, lead ropes and buckets. Assemble an evacuation kit before the crisis strikes, advises Dr. Michalke, and keep it in an easily accessible place (such as your trailer, if you have one).

In your kit, include:

At least a 3-day supply of food (hay and grain), plus two buckets (for food and water) for every horse.
If you have a way to transport water, such as the specially designed, watertight plastic saddle stands made for trailer travel, or other such large, watertight containers, fill them. Water can be hard to come by in a disaster, so you'll better ensure that your horse has a safe supply.
A halter and lead rope for every horse. Add stud chains in case you need them for extra control. Tip: Have dog i.d. tags made, with the horse's name, plus your name, address, and phone number. Or, write the info on each halter with a permanent marker. That way, if your horse should escape or be moved, you'll have a better chance of him being returned to you.
Copies of registration papers, brand-inspection records, and health records--including a negative Coggins
At least a 3-day supply of any medications your horse might need.
Several photos of each horse, to aid in identification. Horses and pets may be shuffled from one site to another during a chaotic situation.
Riding It Out
If you can't evacuate, or doing so would be more dangerous to you than staying put, use the following tips:

Before water lines break or power goes down, fill several large, clean 30- to 55-gallon plastic garbage cans with drinking water for your horses. (Don't forget your family and pets!) You'll need a 3- to 10-day supply. (The average adult horse drinks about 10 to 15 gallons a day, so let that be your guide.)
Set out flashlights and lanterns, along with a supply of fresh batteries.
Consider turning out your horses into a safely fenced pasture with shelter. Generally, they'll be safer in a pasture than in a barn, which could burn or collapse.
Outfit each horse in a leather halter outfitted with either an ID tag or hand-written contact information. (See "Emergency Evacuation Kit," above.)
Close barn doors, so panicked horses can't run back inside.
Turn off power and gas lines.

TERT AT A GLANCETexas Emergency Response Team members quickly recognized the need to address animal evacuation in disasters, particularly after Texas' devastating October l998 flood, in which more than 23,000 cattle drowned. Another 400 hogs, sheep, horses, and poultry also were killed in the violent storm that struck 21 counties in south-central Texas.

TERT was originally formed by the TAHC (the state's livestock health regulatory agency), and Texas staff from the U.S. Department of Agriculture's Veterinary Services. The team was developed to address devastating foreign pests, diseases, or bio-terrorism. On the governor's emergency management team, TERT serves with the Texas Department of Health in collaboration with the Texas Veterinary Medical Association and other livestock and health agencies.

For more online equine emergency and disaster preparedness resources, visit www.aaep.org/emergency_prep.htm.

Shirley & I thank Dr. Mark Michalke & Equus Magazine for this post.

Your Comments are appreciated.

Monday, May 22, 2006

Fly Control and your Horse


This is the Time of Year we all suffer form pesky Fly infestations in our Barns and pastures. In addition to repellents and other fly-foiling measures, giving your horse access to open, breezy pastures can help keep flies at bay.

Photo by Darrell Dodds

How to Identify, Control Pesky Flies

Do you know what's buzzing by? There are many different types of flies, and a product that controls one might not control another. Here's a who's-who to help you identify--and control--pesky flies.


Fly season is fast approaching, and while you may not see too many flying insects right now, early spring is the time to get a jump on the fly population. In the April 2006 issue of Horse & Rider we took a look at the different types of control methods--from barn spray systems to fly parasites. But knowing which flies you have is an important step in controlling them. Bill Warner, an entomologist and new product development manager for Farnam, offers these tips about some of the flies your horse may (literally) be facing:

Biting Gnats
Black flies (or buffalo gnats) and punkies or no-see-ums are small and often overlooked by horse owners. They can carry parasitic worms, disease organisms and may cause allergic dermatitis.

Use fly repellents containing pyrethrins or pyrethroids, or a combination of the two. Apply to frequently attacked areas, especially the ventral midline (chest and belly) and ears.
Drain marshy areas and make banks of stock tanks and ponds steep to reduce breeding areas.
Allow horses access to more exposed breezy areas.

Eye Gnats
Adult Chloropid gnats are non-biting flies but they feed on secretions around a horse's eyes and nose, and have been implicated in the transmission of pink eye, yaws and other diseases.

Good sanitation (see article in Horse & Rider, April 2006) can help reduce breeding sites.
Use repellent wipes, sprays and roll-ons on the horse's face.
Some fly baits can help, but aren't effective as the sole control technique.

Horse and Deer Flies
Horse flies (those big, nasty biting flies up to 1 1/4-inch long) and deer flies (smaller, with black bands across their wings) cause painful bites that can make your horse (and you) miserable.

Pasture horses in breezy, open (non-wooded) areas.
Use fly repellents and wipes.
Drain wet, low-lying areas to reduce breeding areas.
Some fly traps--like Farnam's Epps Biting Fly Trap (farnam.com), or Horse Pal (from Newman Enterprises; bitingflies.com)--are effective.

Horn FlyThese blood-sucking flies are generally only a problem if your horses are pastured near infested cattle.

Use fly repellents, insecticidal sprays and wipe-ons.

Stable FlyIf you hear a lot of stomping, you've got stable flies. This common, blood-feeding fly usually feeds on the lower legs (especially forelegs), and horses will stomp their feet in reaction to painful bites. (Foundered or lame horses that can't stomp are especially vulnerable).

Use feedthroughs, fly parasites, repellents, spray systems and sticky traps.
Remove or compost old bedding, manure and wet hay.

Face FlyOccasionally a problem where horses are stabled near cattle, face flies feed on secretions around the face.

Locate horses far away from pastured cattle.
Use fly masks or repellents.

House Fly
The most common fly pest, house flies love horse manure and the mucous secretions and wounds on horses.

Barn spray systems, traps, feedthroughs, fly parasites, repellents and masts/sheets are all effective.
See the April 2006 issue of Horse & Rider for sanitation and control tips.

Bot Fly
Horse bot flies lay eggs on a horse's coat or skin. When a horse licks his legs, he ingests the eggs, which mature into larvae in the horse's stomach lining.

Treat horses with ivermectins or organophosphates labeled for bot control.
Some feedthroughs (specifically tetrachlorvinphos) can control larval bots.
Apply fly repellents.
Use a bot block, bot knife or even your fingernail to remove the eggs.

Chuck & Shirley Bartok
EQUINE-FUN BLOG
Please leave your Comments.

Tuesday, May 9, 2006


Farnam Sponsors EQUUS Wellness Guide


Farnam is celebrating its 60th anniversary with an exclusive sponsorship of EQUUS magazine's first-ever special issue, an equine wellness guide.
May 4, 2006 -- Farnam Companies Inc., the largest marketer of equine products in the United States, announced May 2 that in celebration of its 60th anniversary, it is the exclusive sponsor of EQUUS magazine's first-ever special issue, "Healthy Horse: A Wellness Guide."

The special issue, which hits newsstands May 9, underscores Farnam's commitment to its consumers and to the industry it has served for more than 60 years. Farnam, a longtime advertiser in EQUUS, has appeared in every issue since the publication's inception in 1977.

In addition to approximately 10,000 issues available on newsstands at a cover price of $3.99, the wellness guide will be mailed to EQUUS' more than 140,000 subscribers, including more than 7,000 equine veterinarians. The guide can also be purchased for $3.99 (plus $2.95 shipping and handling) by calling 1-800-237-8191.

"Throughout its 60-year legacy, Farnam has demonstrated a commitment to consumers that echoes our dedication to the horse and our service to a significant and growing number of horse owners," said Susan Harding, vice president and group publishing director of the PRIMEDIA Equine Network, publisher of EQUUS. "Together, we saw this as an opportunity to deliver a guide that better educates horse owners and enthusiasts nationwide." The guide is being mailed to all EQUUS subscribers at no additional cost.

What a great Opportunity to have this valuable reference Avaialable. We encourage you to get a copy.

Chuck & Shirley Bartok
Please leave your comments

Monday, April 24, 2006


SOME GREAT IDEAS FOR SPRING CLEANING

*Strip your stalls, pull up the mats and clean underneath them.

*Re-tamp the floors & fill in any holes.

*De-cobweb everything, including hayloft.

*Disinfect walls & remove last yr's fly poop by scrub brushing with hot water & Nolvasan Premesis disinfectant.

*Sweep hayloft, throw away loose shraff

*Wash windows

*Empty horse vacuum, disinfect brushes

*Safety check all your tack, disassemble, clean, polish & reassemble.

*Send winter blankets to be cleaned & repaired

*Walk the fenceline & make repairs

*Reseed fields ~plan for rotation or buy portable electric fencing to save new grass

Have fun & enjoy a Good Horse,
Shirley Bartok
SAVE MORE, EARN MORE

Wednesday, April 12, 2006


Build a Barn that Works

A well-designed horse barn saves you money, effort, and time, says a Barn “expert”, who has been involved in the construction of over 600 Barns of all sizes and shapes. Here he helps you plan one that's right for you.

By Chuck Bartok, Barns by Harrahs, Corning, Northern California

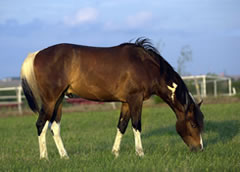
Horses, to me need to be offered adequate, SAFE shelter if we intend to confine them in small areas. A well-designed, well-built horse barn is light, airy, pleasant to work in, is easy to keep clean, and built with materials that allow Maximum SAFETY. In the long run, it pays off in lower upkeep costs, fewer vet bills, and added property value.

THE RIGHT SITE
Look for a barn site that's well drained and offers easy connection to utilities and to the road and/or your driveway. When you find your site, spend time there on a blustery day to identify the prevailing wind direction; then orient your barn with that in mind. You want good air circulation, of course, but you don't want your center aisle to be a wind tunnel-so orient it at about a 45-degree angle to the prevailing wind. If strong winds come from all four directions, you might build a square barn with entrances on all four sides and the ability to close down any one, two, or three as needed.
Plan to put useful but less attractive features, such as your manure bin, out of sight of your house (and the road) but still convenient to the barn. Similarly, put your barn's delivery area where it's less visible-and put delivery and barn parking where they won't mix with horse traffic.

LAYOUT LOGIC
Just as innovative home designs improve kitchen efficiency (for instance, minimizing steps from stove to refrigerator), good horse barn design can do the same for your horse care if you plan with these two rules in mind:
Save steps. Try to eliminate a step (literally) for each job you do: filling water buckets, feeding, tacking up. . . . If you normally take a hundred steps an hour caring for your horses, and your new design trims that to fifty steps, you've cut walking distance, saved time, and so reduced your "labor costs" (in time, or in actual dollars if you have barn help).
Minimize mess. Identify all potential sources of mess and plan your layout to confine that mess. In a four-stall center-aisle barn or smaller, for instance, cluster the stalls; that way, when you muck, the mess stays in their end of the barn. (More than four stalls? Put tack and feed rooms in the middle; saves steps and keeps the middle mess-free.)
You'll see these two rules in action as we go along.

DON'T SKIMP ON SIZE
A major mistake of many barn builders is making the aisle too small. I've worked in barns with aisles so narrow that we had only an inch or so clearance on either side for a tractor and manure spreader to maneuver; we spent $1200 to $1500 a year just repairing doorways. I've also been in one pricey barn with an aisle too small for its big Warmblood residents to turn around in!
For SAFETY and utility, I recommend aisles 16 feet wide instead of the more common 12. A 16-foot aisle gives you enough room to move equipment and horses, brings in plenty of light from the doorways at either end (more on them in a minute), and, because it doesn't require extra labor to build, doesn't cost a lot more than a 12-foot aisle. (Editor's note: For a four- or six-stall barn, MD Barns expert, Chuck Bartok, estimates that going from a 12- to a 16-foot aisle increases total barn cost, including materials and labor, about 9 percent.)
For optimum traffic and flow, you'll want aisle doors to open to a width of at least 12 feet. I prefer paired sliding doors (not so heavy as single doors, and not so likely to sag); to admit light even when they're closed, I like their upper halves to be mostly window. (Where flies are merciless, consider screen doors: hinged inner doors of household screening at either end of your aisle. That's what many barns did before there were fly-control systems.

AIR
Good air flow is crucial to your horse's health.
The very Popular Raised Center Aisle work well and can increase air flow by 400%, if designed properly.
In more inclement areas it is crucial to, again, consider layout for prevailing weather. You can add sliding windows in the Raised portion to ward off severe weather.
If a Gable or Gambrel; style roof is chosen, you may have to consider evacuation fans at the Gable ends to help air circulation Ceiling fans over stalls improve circulation.

LIGHT
Good lighting makes everything more pleasant. The better lighted a horse barn is, the easier it is to work in-and the fewer flies congregate in it.
I recommend windows and skylights wherever possible (though not where they'll subject horses to unrelenting sunlight in hot weather-one reason for placing stall windows high, as recommended above). The more you use natural light, the lower your electric bills. (Note: Most "leakage" from skylights is actually built-up condensation. Prevent it by insulating your roof or lining it with plywood.)
Put a light in every stall, overhead or high on the back wall, on its own switch so you can turn it on without lighting the whole barn.
For aisles, use 8-foot fluorescent "tube" lights, one or two strips wide as needed, with switches at both ends of the aisle.

FLOORING
I like to line aisles and stalls with slab concrete: an 18-inch border around each stall, with the aisle-side slab extending another 18 inches (36 inches total) to border the aisle. (I set stall partitions on top of the concrete.) In the stalls, the concrete prevents pavers from digging holes in corners or by the door. (I've never seen a horse dig in the middle of his floor.) At doorways, it gives a smooth surface going in and out and makes sweeping easier.
For the aisle surface, I like asphalt if I'm on a tight budget and interlocking rubber pavers (about $7.25 per square foot) on a bigger one. Asphalt is easier on horses' legs than concrete, and less slippery; it's also easier to maintain than dirt or gravel. Pavers, which come in black, green, or terra-cotta red, are attractive, resilient, and non-slip. (They are, however, more trouble to clean. Sweeping isn't all that effective, and blowers make barn air even dustier. You can hose them down-or use a yard vacuum; mine cost about $60 from Home Depot.)
For stall flooring, I recommend a 10- to 18-inch gravel base, topped by 6 inches of clay or base rock. Over that, if the budget permits, I like rubber pavers; they stay in place and drain well. Without pavers, flooring requires more maintenance: Over time, holes develop as urine drains down and gets cleaned out. Filling in holes once a year keeps the surface reasonably level.

STALLS
I like stalls square and at least 12 by 12 feet (12 by 16 is even better), with a 10-foot clearance to the rafters. The bigger the stall, the less its occupant walks in soiled bedding-so the easier it is to clean and the more you'll save on bedding in the long run.
Prefab stall partitions run a standard 8 feet high, either solid or topped with bars. The bars promote air flow; they're fine for walls on the aisle. Between stalls, solid partitions are safer-in case neighbors don't get along.
Center the stall door in the aisle wall. Then hang the feed bucket in one corner of the stall and the water bucket in another. That discourages horses from dunking their feed (a habit believed to cause colic) and so minimizes mess.
For both aisle and (if you have them) outside stall doors . . .
Do use:

Sliding doors with secure latching devices are recommended, for SAFETY. Hinged door can get in the way when entering stalls, especially with Horse-in-Hand
Full-length Grilled doors for air flow if you're in a hot climate.- in order to reduce shaving spill, insist on a Solid “kick-panel” up about 18” -24” You'll also want solid outside doors to close in bad weather.

BATHING AND GROOMING
Except in stormy or truly frigid weather, I bathe horses in an outside wash stall. (It can be a simple rough-concrete slab with crossties and hot and cold running water-probably less than $1000 to install.) If you use hot water, cover the horse, bring him in, towel him off, cover him again, and walk him until he's dry (all things you should do bathing inside, too), he'll be comfortable and he won't catch a chill.
Inside, then, instead of a wash stall, I like a cleaning stall where you can groom, rinse boots, clean tack, and bathe in bad weather. Put a drain in the center of the floor; make the floor brushed concrete, sloped 4 degrees toward the drain. Line the side walls with storage cupboards; in the rear, put a large steel sink, a counter, windows over the counter, and more cupboards. (Lack of storage space is most barn owners' number-one complaint. As you're planning your barn, make a list of every item you might use on, near, or around horses. Then find or build a home for it-in a closed cabinet where possible, and away from your major source of dust, the stalls, because even closed cabinets can't seal out all dust.) Some people want wash stalls totally bare, or with minimal storage high up. But in the thirty years I've built barns, this layout has never resulted in a horse injuring himself, his caretaker, or the furnishings.

TACK ROOM
No matter how tight your budget, I recommend separate tack and feed rooms-because clean tack hung in a feed room will quickly accumulate dust. If you're short on space, you can partition a 12-foot stall to give tack its own closed area. Use windows to let in light and reduce mildewing. (Your tack may dry out faster, but that's an easier problem to fix.) Give yourself counter space and plenty of storage cabinets. Spring for a mini-refrigerator (about $140; it'll quickly pay for itself keeping expensive medications from going bad). If there's room, another sink lets you mix medications, wash dishes, etc.

FEED ROOM
Keep only about a week's worth of grain and a day's worth of hay in your feed room. Store the rest in another building , for both cleanliness and cost. (Storing hay in the barn raises your fire-insurance premium-more than doubling it in California. And some insurance companies won't cover barns that store hay.)
Other feed-room pointers:
Line your grain bin with sheet metal to keep rodents out. If you use two or more feeds, add partitions to keep them separate.
To minimize mess, load one day's worth of hay (one or two bales) in a wheelbarrow and wheel it over from your storage area in the morning; stow it in your feed room between meals.
Install cabinets to store supplements. First, though, measure what you'll be storing; gallon jugs and quart bottles won't fit on shelves of a width and height meant for coffee mugs.
If you're installing a washer and dryer, put them here (not in your tack room; they'd add too much moisture to the air).

CLEANING STORAGE
Build a "storage" to store cleaning tools-pitchforks, shovels, muck baskets, wheelbarrow, vacuum, etc.-separately from feed, tack, and other equipment. The area needn't be large; about 3 by 8 feet of floor space will suffice. (You have more space? The washer and dryer could go here.)

UTILITIES
Access to light, water, and electricity by every stall saves steps. Group switches, spigots, and electrical outlets between every two stalls.
Water: I'm convinced that the most healthful way to provide water is by individual bucket, filled not from a hose (you're tempted to skip rinsing the bucket before refilling) but from a spigot; putting spigots between stalls makes it convenient, too. (Spigots project about 3 inches; set about 30 inches above the ground, especially in a 14-foot aisle, they aren't a safety risk.) In my experience, automatic waterers are impossible to keep clean-and they invariably get broken and flood stalls.
Having hot as well as cold running water available lets you take the chill off baths and clean horses and equipment much more effectively.
Electricity: Make it your safety goal never to need an extension cord in your barn. Install electrical outlets everywhere you might ever need them. Along with the regular 110-volt outlets, include at least one 220-volt: for your hot-water heater, for a dryer if you're installing one, and maybe for things like x-rays now and then. Even if it's used just once or twice a year, it's worth the $40 cost to install. (Have an outside wash rack? Consider putting an outlet there, with a snap-close cover to keep water out.)

PEOPLE COMFORTS
Installing a restroom in your barn is not a big expense. If you hire a helper, state law may require a restroom. Even if not, it both saves you steps and minimizes mess (you're not tracking mud and muck into your house). If the building codes require too much restriction, a good "Portable Potty" rental; may be the answer, especially during the nice weather season, when more time is usually spent at the Barn Site.

Saturday, March 25, 2006


A Barn Safety Design Guide

Generalization does not lend itself well to barn building because of the tremendous number of variables in any project: purpose, budget, image, climate, available materials and labor, personal preferences, future plans and so on. These variables make good planning critical to the overall success of the project.
By Todd Gralla

Planning is critical to safe horse barn design.

Planning is as important to the person who owns one or two horses as it is to the big breeder. It's about thinking through what you want in your facility and then figuring out the best way to get it. The idea is to build what is cost-effective, what gives you the best quality for your money, and what avoids doing something that will cost you a lot more later on.
All of the barn problems that plague horse owners can be resolved. Some of the solutions are inexpensive. Many are not. But remember, all of them are much more cost-efficient if they are solved before the barn is built.

Site Considerations

A horse barn's site position should be given careful consideration. For example, the barn's orientation to wind and sun should be considered. The ideal is to capture summer breezes for their cooling effect while avoiding the winter wind.
Roofs can be designed to take advantage of the sun's heat in the winter, with overhangs planned to provide shade, to serve as windbreaks, and to screen private areas. Good water drainage is also essential for maintaining a healthy stable, as standing water and marshy areas are breeding grounds for insects and disease.

Health And Safety

Given the fact that a horse can injure himself in ways his owner never dreamed of, it is basic safe practice to eliminate sharp edges, fire hazards, and the potential for sickness or disease with attention to detail

Barns with inadequate natural ventilation are a major cause of respiratory problems in horses as dust, odors, and germs cause air to stagnate and become unhealthy. The principle of natural ventilation is not a complex one. Hot air naturally rises (think of a chimney). The problem occurs in making sure that air has a place to escape and that fresh air is continually pulled into the structure.

Fire safety is also important, although it is often overlooked when barns are built. Masonry and steel are not combustible; however, there are many other things within a barn that are, such as paint, equipment, electrical wiring, and more….


Todd Gralla is with Stan Gralla Architects, Lexington, Okla. Stan Gralla Architects has been in the business of planning and designing equestrian dreams since 1973. The firm has completed more than 300 equestrian facilities across North America and Mexico.

How to Fireproof Your Barn

How to Fireproof Your Horse Barn
Here are 17 tips you can use to fireproof your horse barn, protect your horses and make sure you're ready for the worst.

Reduce your risk of barn fire--and keep your horses safe--with careful maintenance, planning and attention to barn fire prevention.

1. Start outside. If you live in an area where wildfires are a possibility, make sure you clear a 50-foot firebreak around your barn. Remove brush, trees, tall grass and debris.
2. Protect against lightning. Intall a grounded lightning rod system to protect your barn in electrical storms.
3. Try to have both a water supply and a power supply installed outside your barn. Keep a hose attached to your external water supply.
4. Install smoke detectors. Detectors and alarms that sense heat and smoke can save critical time if a fire does start. Make sure you check them regularly (at least twice a year). You may also wish to connect the smoke alarms with a loud, external siren or an alarm that will sound somewhere it can be heard if no one is in the barn.
5. Store hay and combustibles like shavings in a separate building. Some insurance companies require hay to be stored in a separate building, so check with your agent.
6. Make sure that the hay you store is cured properly and that it's kept dry. Wet hay can start fires through spontaneous combustion.
7. Don't use extension cords. If you really need to, use an industrial-grade cord and don't overload it.
8. Check electrical cords for damage, and replace any that may have been chewed by mice or squirrels.
9. Consider installing a sprinkler system. While the initial investment may seem high, check with your insurance agent to see if he or she offers discounts for barns with sprinklers. Some may cut your annual premium by as much as 50 percent.
10. Place fire extinguishers within reach. Place them every 40 feet or consider keeping one at each entrance, in the tack room and near feed storage. Make sure they're charged and protected from freezing.
11. Keep your barn clean. Dust and cobwebs are fire hazards, as are oily rags and paper towels.
12. Cage all electric light fixtures.
13. Keep a halter and leadrope on every stall door. Consider marking each with glow-in-the-dark paint or reflectors.
14. Ban smoking in your barn (and within 20-30 feet, at least). Post "No Smoking" signs and enforce the ban.
15. Post directions to your barn next to the phone.
16. Keep important numbers where you can find them quickly and have an emergency plan in place -- along with a plan for how emergency equipment could access your barn most quickly.
17. If Possible build one on the many zero flame spread Barns on the Market

Ask your local fire department to do a walk-through of your barn to point out other fire-prevention steps you can take. If fire does break out, keep your cool -- and your priorities:

Get people of out of your barn.
Call the fire department.
Get your horses out if you can do so without risking human lives.
Use fire extinguishers and/or hoses -- but only if you can do so safely.
Step aside when the fire crew arrives and let the pros handle it

Thanks in part to Equisearch.com